
800.995.1555


Quick Tips:
*When designing your calendar, click "SAVE" often to ensure no progress is lost.
*To get your text to go to a second line, use the 'enter' key (do not add spaces).
*When adding sections of text, adding a lot of spaces between each block of text will not work - your final PDF will come out messed up / won't match your design. Instead, use separate text boxes for each chunk of text.

What fonts are used in the templates?
Template 1
Mini Grids: Gothic A1 Regular
Month Name: Cabin Regular
Weekdays: Roboto Regular
Grid Days: Gothic A1 Regular
Holidays: Roboto Condensed Regular
Template 2
Mini Grids: Gothic A1 Regular
Month Name: Italianno Regular
Weekdays: Roboto Bold
Grid Days: Gothic A1 Regular
Holidays: Roboto Condensed Regular
Template 3
Mini Grids: Gothic A1 Regular
Month Name: Cabin Regular
Weekdays: Roboto Regular
Grid Days: Gothic A1 Regular
Holidays: Roboto Condensed Regular
Template 4
Mini Grids: Gothic A1 Regular
Month Name: Gothic A1 Extra Bold
Weekdays: Roboto Condensed Bold
Grid Days: Gothic A1 Extra Bold
Holidays: Roboto Condensed Regular
How does the back cover auto fill feature work?
By default, the back cover placeholders will populate with your monthly images.
If you want to change this (use different images or delete all placeholders), you must first click the "Auto Fill" button > OK. That will break the auto fill functionality and will let you edit the page however you like.
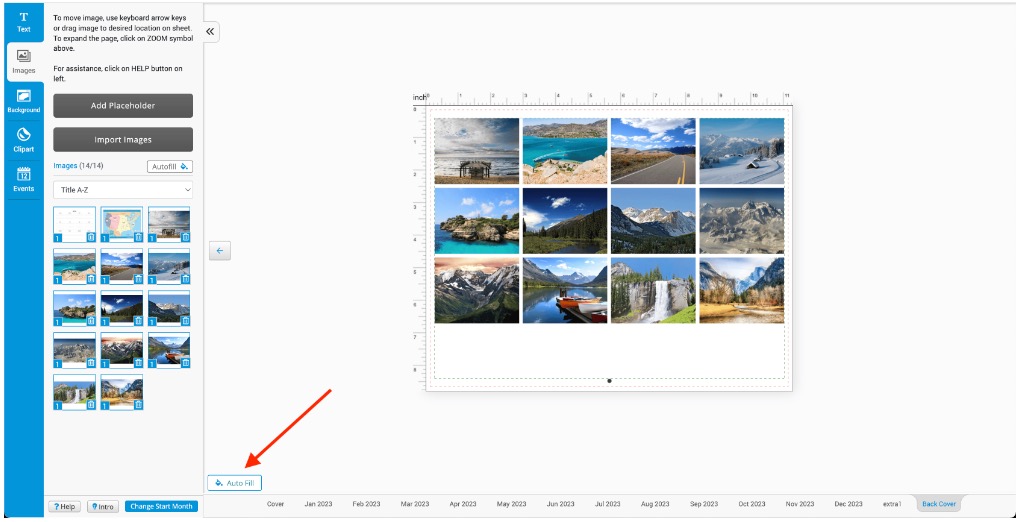
If you disable the auto fill feature and decide later that you want it to turn back on, all you need to do is click the 'Auto Fill' button again.
How do I outline my text or add a border?
Click on the text box > click Effect.
To add an outline, use the "Stroke" section. To add a border, use the "Border" section.
How do I add an image to my design?
There are two ways to add an image:
1. Drag and drop your image onto a image placeholder. That image will fill the placeholder you add it to.
2. Click on the image. This will add the image to the artboard (not in a placeholder).
If you need the image to be a specific size, we suggest adding a placeholder first, resizing it to how you'd like and then drag and drop the image into that placeholder.
What type of images should I use?
Image Specifications
Image Resolution
300 dpi
File Types
JPG, JPEG, PNG
Max Image Size
50MB
What size should my images be if I'm editing them beforehand?
If you are sizing and editing your top month images before placing them into the design tool, design them to be these sizes (or dimensions) so they fit correctly and include enough for the bleed.
Wall Calendars:
11" x 8.5": 3375 x 2625 pixels (11.25" x 8.75" at 300 dpi)
8.5" x 5.5": 2625 x 1725 pixels (8.75" x 5.75" at 300 dpi)
12" x 9": 3675 x 2775 pixels (12.25" x 9.25" at 300 dpi)
12" x 12": 3675 x 3675 pixels (12.25" x 12.25" at 300 dp)
6" x 6": 1875 x 1875 pixels (6.25" x 6.25" at 300 dpi)
Desk Calendars
8.5" x 5.5"
Cover: 2625 x 1725 pixels (8.75" x 5.75" at 300 dpi)
Front: 1388 x 1725 pixels
Back: 2625 x 1264 pixels
10" x 4.5"
Cover: 3075 x 1425 pixels (10.25" x 4.75" at 300 dpi)
Front: 2005 x 661 pixels
Back: 3075 x 925 pixels
What do I do if my picture is low resolution?
You can shrink the image to try and make it smaller or find a higher resolution version of that image. If those options don't work, you will need to find a new image. If you use a low resolution photo, be aware that the image may print fuzzy/pixelated.

When adding a Background, what is the difference between Single Side, Both Side and Stretch?
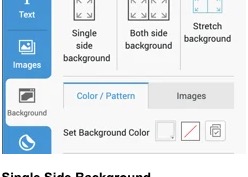
Single Side Background
You are applying the background to 1 page only (the page you currently have selected).
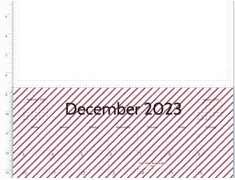
Both side background
You are applying the background to both pages open. It will repeat the same design on both pages.
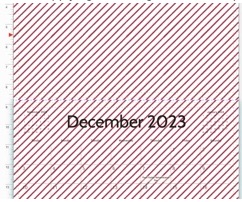
Stretch background
You are applying the background to both pages open. It will stretch the design across both pages so it will flow from one page to the other.
How do I add shapes to my design?
Clipart > Shapes section
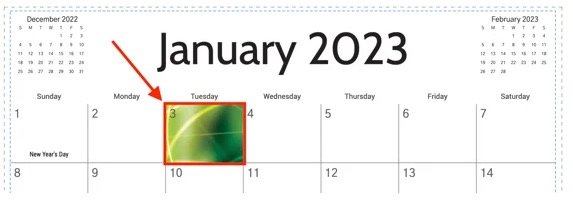
How do I create, edit and delete holidays/events?
There are two ways to edit events:
1. Click on the date in the Calendar grid. This will open a popup where you can add an event and/or add a background image to that grid box.
2. In the left panel, click "Events". To remove holidays automatically added to the calendar, use the "Public Holidays" tab and deselect. To add/edit additional events, use the "Your Events" tab, select a date, name it and click 'Add'.
Unable to select an image or text box you added to the calendar grid?
Follow these easy steps!
Click the layers button at the top of the design tool:

Find the layer for the element you want to select and use the up/down arrows to move that layer to the top of the list:
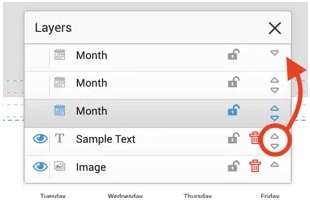
Now you should be able to select that image/text box.
Having a hard time aligning your images/text boxes evenly?
We suggest turning on (1) 'Grid' and (2) 'Snap to Grid' options.
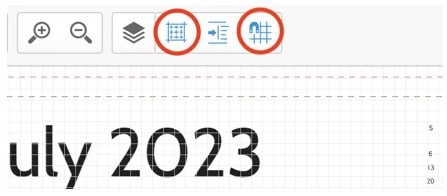
"Grid" turns on the grid lines for each page (the boxes shown on the page above).
"Snap to Grid' will snap your image or textbox to the nearest grid line.
For the two filler pages, how do I create my own design?
All you need to do is open the extra pages > click on the page/image > delete.
What are the dimensions for the advertising area on Templates 3 & 4?
• 11x8.5 Wall -- CLICK HERE to download the 11x8.5 ad space template
• 8.5x5.5 Wall -- CLICK HERE to download the 8.5x5.5 ad space template
• 12x12 Wall -- CLICK HERE to download the 12x12 ad space template
• 12x9 Wall -- CLICK HERE to download the 12x9 ad space template
• 6x6 Wall -- CLICK HERE to download the 6x6 ad space template
• 10x4.5 Desk: -- CLICK HERE to download the 10x4.5 Desk ad space template

What are the dimensions for the grid boxes?
11x8.5 Wall
- Templates 1 & 2 = 214px x 162px
- Template 3 = 214px x 136px
- Template 4 = 162px x 170px
8.5x5.5 Wall
- Templates 1 & 2 = 158px x 92px
- Template 3 = 158px x 82px
- Template 4 = 120px x 98px
12x9 Wall
- Templates 1 & 2 = 232px x 170px
- Template 3 = 230px x 130px
- Template 4 = 174px x 170px
12x12 Wall
- Templates 1 & 2 = 224px x 240px
- Template 3 = 224px x 194px
- Template 4 = 170px x 240px
6x6 Wall
- Templates 1 & 2 = 112px x 112px
- Template 3 = 112px x 94px
- Template 4 = 82px x 112px
10x4.5 Desk
- Template 1 = 192px x 54px
- Template 2 = 192px x 52px
© 2023 PrintingCenterUSA